Plugins
WordPress
Installing the WordPress Plugin
The easiest way to install Everfund into a WordPress website is by downloading Everfund's plugin in the WordPress plugin store or download it directly from WordPress here as it is version controlled and can always be updated automatically through WordPress plugin system.
Step 1
Go to the Plugins Page and click Add New 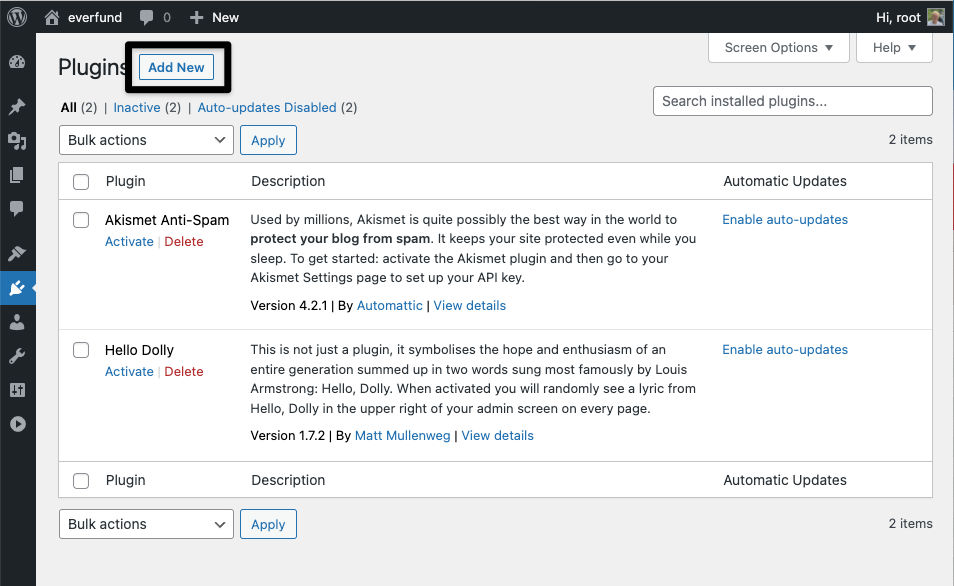
Step 2
- Search for "everfund", Everfund Donation Widget should appear in the search results
- Click Install Now

Step 3
- Activate the Everfund plugin
- Optional - Chose to enable auto updates to the Everfund widget

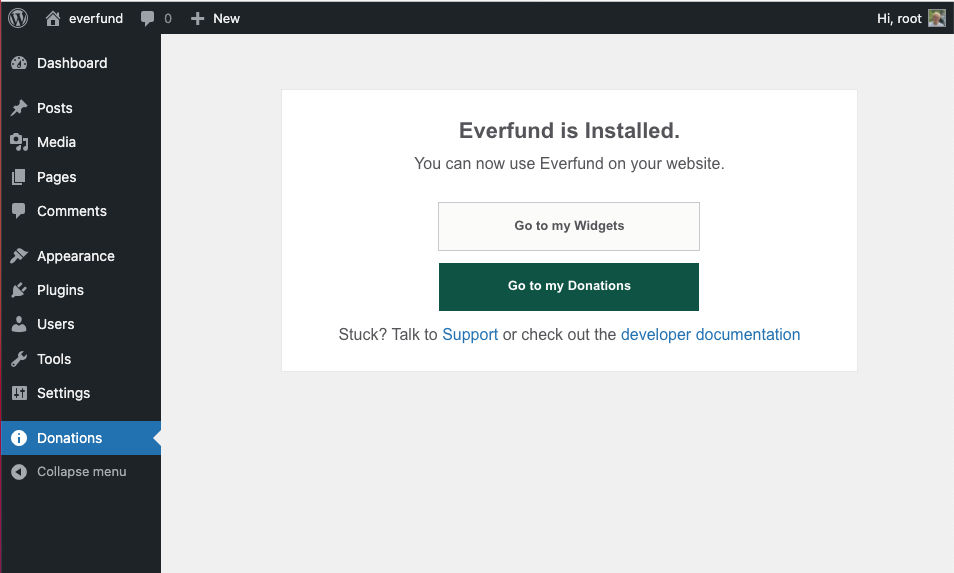
Step 4
Now that the widget is installed, you'll see a new sidebar item has been added called Donations. This is a quick way to get to whether the widget has been fully set up and the script has been injected onto the required pages.
Using the Gutenburg Editor to add in a donation button
The Guttenberg editor is the latest editor that is now activated by default on every WordPress website. You can use the default button block to create a donation button for Everfund and follow the steps to find out how.
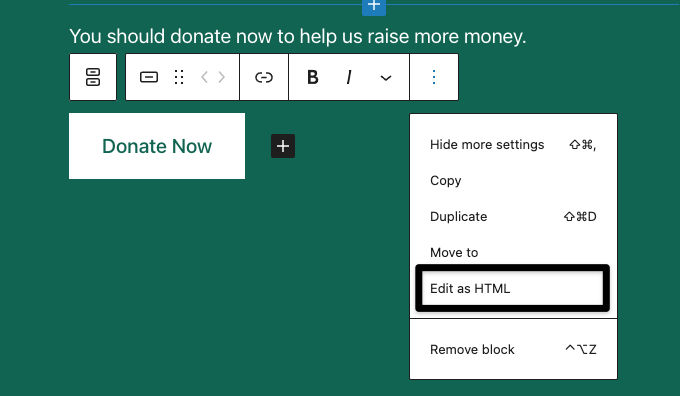
Step 1
Create a donation button and then click edit as HTML
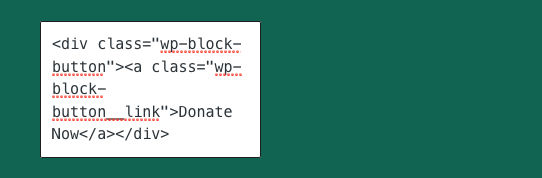
Step 2
Add the custom anchor of data-ef-model to the a tag
Example:
<div class="wp-block-button">
  <a class="wp-block-button__Link" data-ef-modal="j1q16MvJl5lqfji06bVFKei3HZkW">
    Donate Now
  </a>
</div>
Step 3
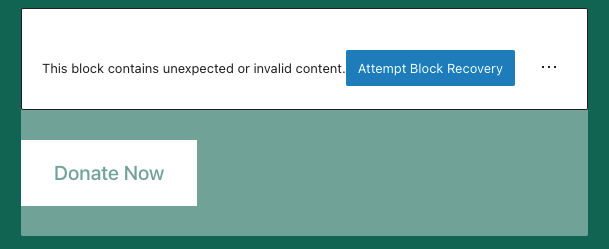
On confirmation, the editor will believe that the block is invalid or unexpected content and will give you an option to attempt to recover the block. Do not attempt to recover the block. Just click save and then go to the website and you'll see that the donation button looks normal and when clicked it will open up the Everfund donation widget.
Using the widget outside the WordPress editor
Instead of using the WordPress editor you can hard code the data-ef-modal anchor onto any element anywhere on the website using the donation button or model.